As a member of Sugar's support team, I'm dedicated to helping you make the most of our products and services. With years of experience in troubleshooting and customer assistance, I hope to share valuable tips that can streamline your user experience. Let’s dive into some simple, effective ways to maximize functionality and get the most out of your Doc Merge tools.
Tips for Using Doc Merge and Photos in Your Templates
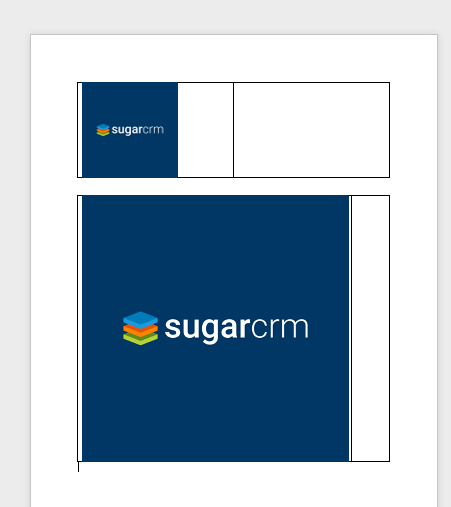
When working with Doc Merge to generate dynamic documents that include images, it's important to understand how the image handling and formatting features interact with your document’s layout. One common issue that arises is ensuring images fit properly within sections without causing unwanted "bleeding" (where the image extends off the edge of the page). In this article, I’ll walk you through some tips to help you format your document correctly and manage images effectively.
Why Scaling Doesn’t Always Work
Many users believe that scaling an image through Doc Merge will prevent the image from bleeding off the page, but this isn't always the case. The scale feature adjusts the image size proportionally, but it doesn't automatically control the layout or positioning of the image within its container. If the image is larger than the available space or the container isn't properly formatted, the image can still spill over.
To effectively prevent this from happening, formatting the table in Word can save a lot of headache.
Step-by-Step Guide to Properly Format Tables for Image Fields
For this example, I’m assuming you’ve already created the necessary Image datatype fields in Studio (e.g., four image fields for the images you want to display). The goal here is to make sure that each row only displays if there’s an image available, and the table behaves dynamically when merged.
- Format Your Table in Word
- Create a table in Word that has four rows and two columns.
- For this, go to Insert > Table and select 4 rows and 2 columns.
- Adjust Table Properties
- Right-click anywhere inside the table and select Table Properties.
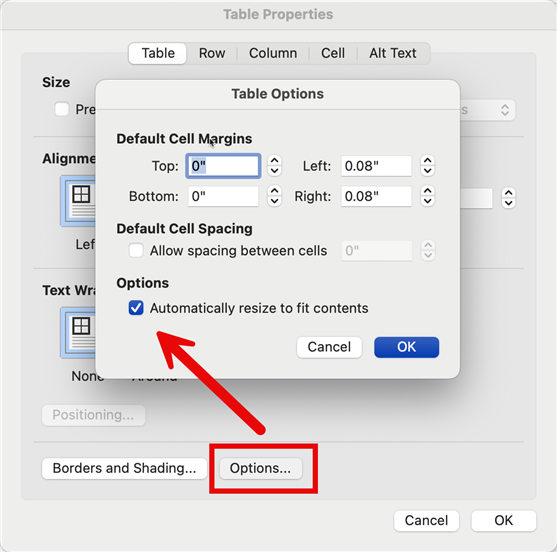
- Go to the Options tab and make sure you check the box for 'Automatically resize to fit contents'. This will allow Word to adjust the cell sizes automatically based on the content (in this case, images) that gets inserted during the merge process.
- Adjust Cell Settings
- Switch to the Cell tab and check the box for 'Fit text'. This ensures that the text or images within the cell won’t overflow, and will instead shrink or adjust to fit within the available space.
- Insert Placeholders for Images (in my example they are named ‘picexpand’ – ‘picexpand4’)
- We want to structure the table to only display rows when an image is available.
- In the first column I have: {if (picexpand_c)} {picexpand_c scale='.25'}
- The second column is just: {endif}
- I made the second column very thin since there isn’t anything to display in that column
- I also scaled the images to 25% (adjust this according to your original picture size)
|
{if (picexpand_c)} 1{picexpand_c scale='.25'} |
{endif} |
|
{if (picexpand2_c)} 2{picexpand2_c scale='.25'} |
{endif} |
|
{if (picexpand3_c)} 3{picexpand3_c scale='.25'} |
{endif} |
|
{if (picexpand4_c)} 4{picexpand4_c scale='.25'} |
{endif} |
- Remove Table Borders and Shading
- Under Borders and Shading, select None to ensure there are no visible borders that might interfere with the document’s look. You want a clean, borderless presentation of the images.
- Test the Merge
- Once your table and formatting are set up, run a test merge to ensure that the images are positioned correctly within the table. Ensure that if any image fields are blank, the corresponding row doesn’t appear in the document.
Why This Works
By setting up your table with these properties, you're giving Doc Merge a much better chance of correctly handling the dynamic nature of images in your document. The "Automatically resize to fit contents" option helps Word adjust the cell sizes dynamically based on the images, while the "Fit text" option ensures the content inside the cell doesn’t cause it to expand uncontrollably. Removing the borders also helps ensure that the layout looks clean and consistent.
Final Thoughts
When dealing with Doc Merge and images, it’s crucial to plan your layout in Word first and understand how Word handles image placement within tables. The scale feature alone won’t prevent images from bleeding off the page, but with a little preparation and the right table settings, you can achieve a clean, professional result.

