Have you ever wished you could quickly email yourself a list of contacts who were sent a campaign, without relying on the download feature in the email campaign dashboard? You're in luck! With a custom report in Sugar Market, you can easily pull this information and send it to yourself. Follow this step-by-step guide, and you'll have your report in no time.
Step 1: Find the Campaign ID
The first step is to identify the ID of the email campaign you want to report on.
- Navigate to the Emails Section
Go to the menu in Sugar Market and select Emails. - Locate Your Campaign ID
In the list of email campaigns, find the relevant campaign and note its ID in the "ID" column. This will help you ensure you're reporting on the correct campaign.

Step 2: Create a Custom Report
Once you have the campaign ID, you can create a custom report.
- Navigate to the Custom Reports Section
From the menu, select Analytics > Custom Reports. - Start a New Report
Click the Create button and choose Report Builder.
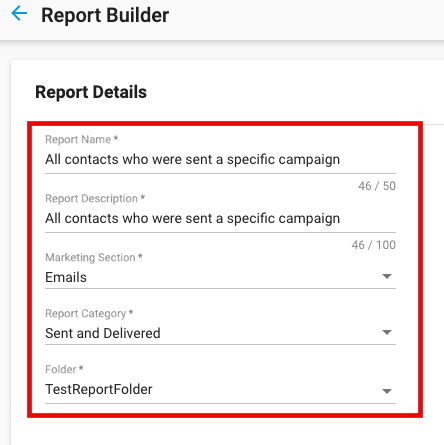
- Enter Report Details
Fill in the following details:- Report Name: A descriptive title, such as "Contacts Sent Campaign X."
- Report Description: Optional, but helpful for future reference.
- Marketing Section: Select Emails.
- Report Category: Choose Sent and Delivered.
- Folder: Save the report in a folder of your choice.

Step 3: Select Data Columns and Campaign
Now it’s time to define what information your report will include.
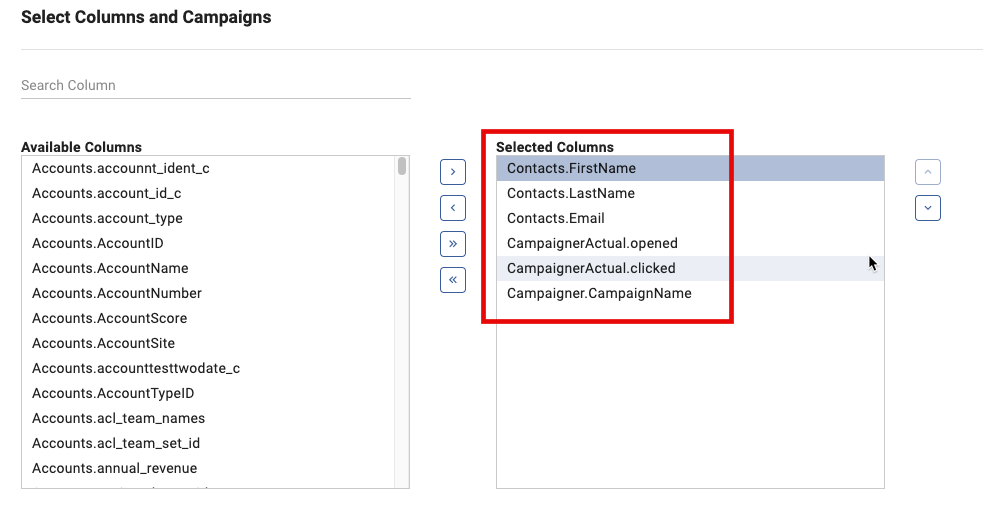
- Choose Your Data Fields
Drag the following fields from the left panel to the right:
- Contacts.FirstName
- Contacts.LastName
- Contacts.Email
- CampaignerActual.opened
- CampaignerActual.clicked
- Campaigner.CampaignName
- (You can add more fields as needed.)

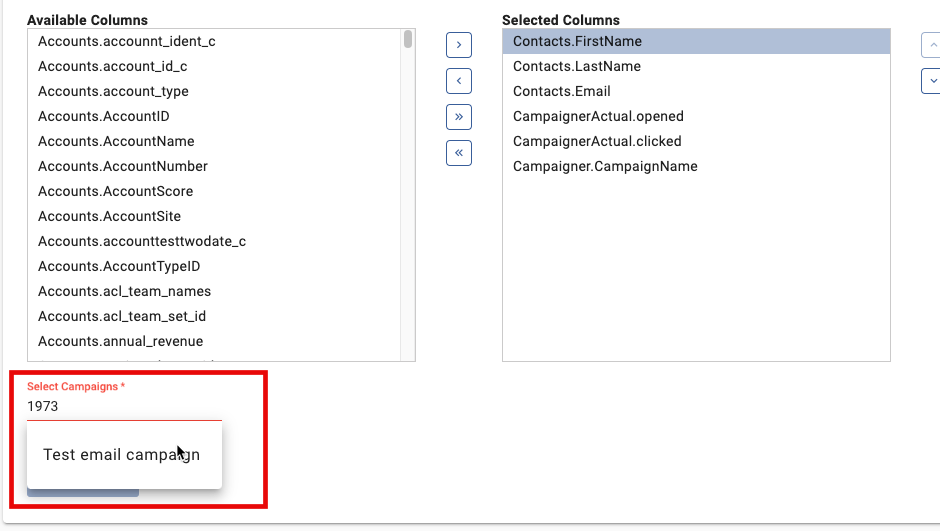
- Filter for Your Campaign
- Click into the Select Campaign field.
- Type the campaign ID (e.g., 1973). The corresponding campaign name will appear, ensuring accuracy.
- Select your campaign.

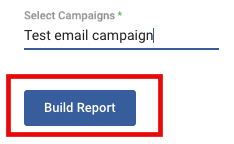
- Build the Report
Click the Build Report button to generate the report.
Step 4: Fine-Tune and Send Your Report
After building the report, review and refine it as needed:
- Review Filter Criteria
On the Filter tab, confirm the report is filtering for the correct campaign and email status (e.g., CampaignerActual.Status = 1 for "Sent" emails).
- Run and Preview the Report
Click Run Report, then choose Run Preview to review the data.
- Email the Report
Once satisfied, run the report again and choose the option to email it to yourself.
Conclusion
Creating and emailing a custom report in Sugar Market is a straightforward process that saves you time and ensures you always have the data you need. By following these steps, you can confidently gather recipients that were sent a specific campaign with ease.
Need additional help? Reach out to your team or Sugar Market support to ensure you get the most out of your reporting features!
