
Notes is a common module used to track ad hoc information within Sugar. Sugar Enterprise customers that use the Customer Self-Service Portal will notice that comments logged in that system appear as Notes within Sugar. So making sure there are not any unread Notes can be important daily task for these users. But how do you know if you have viewed each Note already?
In this post we are going to explore how we can add Read and Unread statuses to the Notes module.
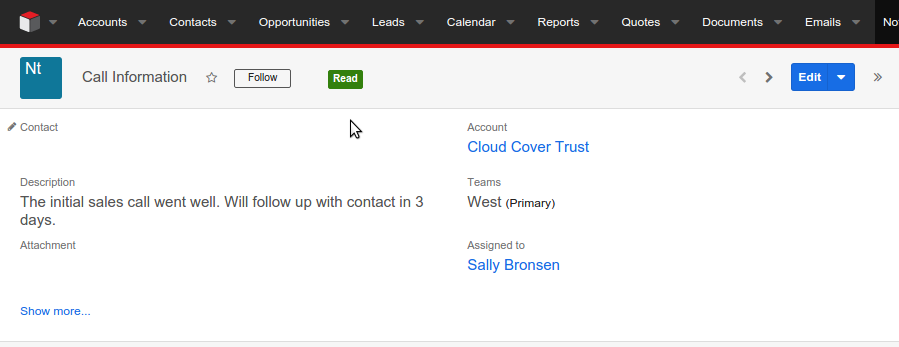
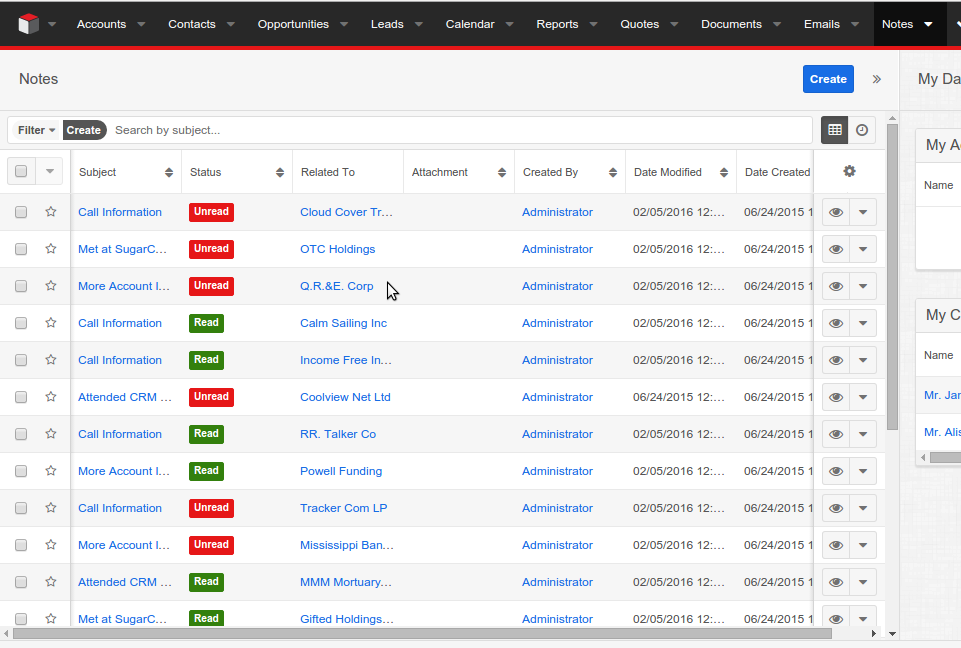
This idea is taken from the Sugar Notifications Module which also comes out of the box with Sugar. Basically we will have a new field type styled with Bootstrap labels. The Notes status field will be highlighted with a green label if it has been read and a red label if it is unread.
This new field will be available for Record, List and Subpanel List views. The status will automatically change to Read when any Sugar user opens and views a Note. Notes created through Customer Self-Service Portal will be marked Unread while those created in Sugar by regular Sugar users will be marked as Read. However, Sugar users will also be provided the option to toggle this status by clicking the viewed status label.
We will also provide mass update functionality to update the status of many selected notes all at once! Whew!
Step 1: Adding a new field for Notes Module
Our first step is to create a new status field for Notes module.
Navigate to Admin > Studio > Notes > Fields
Create a new drop down field with name 'is_read_c'. Select the list name as 'notifications_status_dom'. I have set the display label as 'Status'. But you can change the label as per your wish. Also keep the Mass Update check box checked.
Step 2: Create new Read field type
Our next step is to add a new field type called Read for the Notes module. Our new field is_read_c will use this new field type.
Read Field Controller
custom/modules/Notes/clients/base/fields/read/read.js[gist read.js
({
/**Define our custom events for the field
  * */
    events: {
'click [data-action=toggle]': 'toggleIsRead',
'mouseover [data-action=toggle]': 'toggleMouse',
'mouseout [data-action=toggle]': 'toggleMouse'
    },
    plugins: ['Tooltip'],
/**
     *
     * The read field is always a readonly field.
     * If `mark_as_read` option is enabled on metadata it means we should
     * automatically mark the notification as read.
     *
 */
initialize: function(options) {
options.def.readonly = true;
this._super('initialize', [options]);

if (options.def && options.def.mark_as_read) {
if(_.isEmpty(this.model.get('id'))){
this.model.set('is_read_c',true);
  }else{
this.markAs(true);
  }
        }
    },

/**
     * Event handler for mouse events.
     *
     * @param {Event} event Mouse over / mouse out.
 */
toggleMouse: function(event) {
var $target= this.$(event.currentTarget),
            isRead = this.model.get('is_read_c');
if (!isRead) {
return;
        }
var label = event.type === 'mouseover' ? 'LBL_UNREAD' : 'LBL_READ';
$target.html(app.lang.get(label, this.module));
    },
/**
     * Toggle notification `is_read_c` flag.
 */
toggleIsRead: function() {
this.markAs(!this.model.get('is_read_c'));
    },
/**
     * Mark notification as read/unread.
     *
     * @param {Boolean} read `True` marks notification as read, `false` as
     *   unread.
 */
markAs: function(read) {
if (read === this.model.get('is_read_c')) {
return;
        }
this.model.save({is_read_c: !!read}, {
            success: _.bind(function() {
if (!this.disposed) {
this.render();
                }
            }, this)
        });
    }
})
]
Read Field Templates
Below we define detail and list view templates for the new field type.custom/modules/Notes/clients/base/fields/read/detail.hbs
[gist read_detail.hbs
{{!--
/*
 * this template will be used when the field renders in record view.
 */
--}}
{{!-- restricting the field in create view --}}
{{#if model.id}}
 <span data-action="toggle" class="label{{#if this.model.attributes.is_read_c}} label-success{{else}} label-important{{/if}}">
{{#if this.model.attributes.is_read_c}}{{str 'LBL_READ' this.module}}{{else}}{{str 'LBL_UNREAD' this.module}}{{/if}}
 </span>
{{/if}}
]custom/modules/Notes/clients/base/fields/read/list.hbs
[gist read_list.hbs
{{!--
/*
 * this template will be used when the field renders in list and subpanel list views.
 */
--}}
<span data-action="toggle" class="label{{#if this.model.attributes.is_read_c}} label-success{{else}} label-important{{/if}}">
{{#if this.model.attributes.is_read_c}}{{str 'LBL_READ' this.module}}{{else}}{{str 'LBL_UNREAD' this.module}}{{/if}}
</span>
]
Step 3: Add Status field to Notes View metadata
Now we will add the status field to Notes module views through extensions. Below steps will explain you how to add the fields to record and list view. You can add the extension file to add the field to subpanels as well.custom/Extension/modules/Notes/Ext/clients/base/views/record/record.php
[gist notes_record.php
<?php
 $is_read = array(
 'name' => 'is_read_c',
 'type' => 'read',
 'dismiss_label' => true,
 'mark_as_read' => true, //if true note will be marked as read when the user opens the note
 );
 /** I am adding my status field as a last field in the header panel of notes record view
  * */
 foreach ($viewdefs['Notes']['base']['view']['record']['panels'] as $key => $panel){
 if($panel['name'] == 'panel_header'){
 array_push($panel['fields'],$is_read);
 $viewdefs['Notes']['base']['view']['record']['panels'][$key]['fields'] = $panel['fields'];
 break;
  }
 }
]
custom/Extension/modules/Ext/Notes/clients/base/views/list/list.php
[gist notes_list.php
<?php
 $is_read = array(
 'name' => 'is_read_c',
 'type' => 'read',
 'default' => true,
 'enabled' => true,
 );
 /** I am adding my status field to the second column in the header panel of notes list view
  * you can modify this code to place your field in column which you like
  * */
 foreach ($viewdefs['Notes']['base']['view']['list']['panels'] as $key => $panel){
 if($panel['name'] == 'panel_header'){
 $fields = $panel['fields'];
 $splice = array_splice($fields, 1);//splicing field array from second column onward
 $newFields = array();
 array_push($newFields,array_shift($fields),$is_read);
 foreach($splice as $field){
 array_push($newFields,$field);
   }
 $viewdefs['Notes']['base']['view']['list']['panels'][$key]['fields'] = $newFields;
 break;
  }
 }
]
Step 4: Add display labels for the new field type
Our final step is to define the display label for our new field using Language extension.custom/Extension/modules/Notes/Ext/Language/sugarfield_is_read.lang.en_us.php
[gist sugarfield_is_read.lang.en_us.php
<?php
$mod_strings['LBL_READ'] = 'Read';
$mod_strings['LBL_UNREAD'] = 'Unread';
 ?>
]
Step 5: Run Quick Repair and Rebuild
Finally, you will need to run Quick Repair and Rebuild in order to build your new extensions. You will also need to do a hard refresh of the browser page in order to load the updated JavaScript and CSS files.