
Understanding your audience's preferences are crucial. Imagine having the ability to peek behind the curtain and witness the precise moments when contacts choose to engage or disengage with your content. Well, buckle up because, with preference lists and custom reports, you can do just that!
Before we begin, you will need to have at least one preference list. If you do not have one, you can create one. To do this, go to the menu, make your way over to Lists > Preference Lists and create a new preference list. If you need help creating the list you can follow the instruction outlined in our documentation here.
Now that you have a preference list, We will create our own custom view that connects preference list data with contact data. After that, we will create a custom report that pulls in data from that custom view.
Creating a custom view:
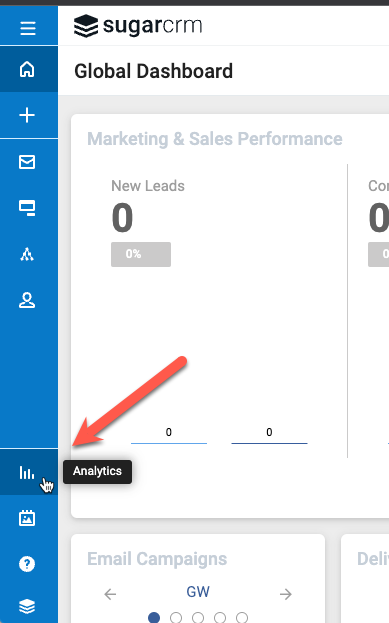
Click into the Analytics section from the left navbar.
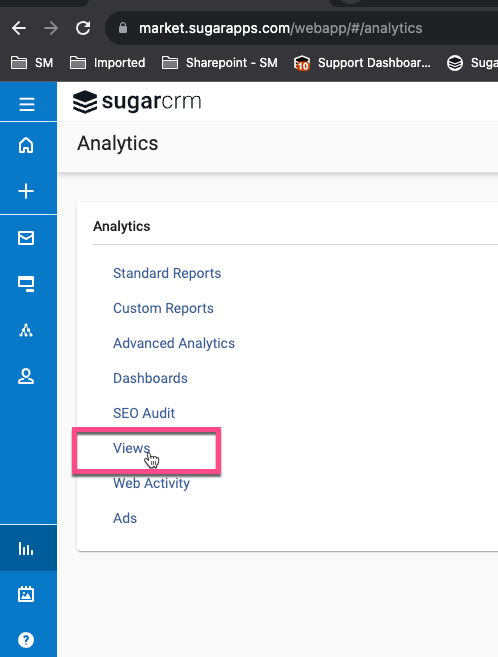
Select View.
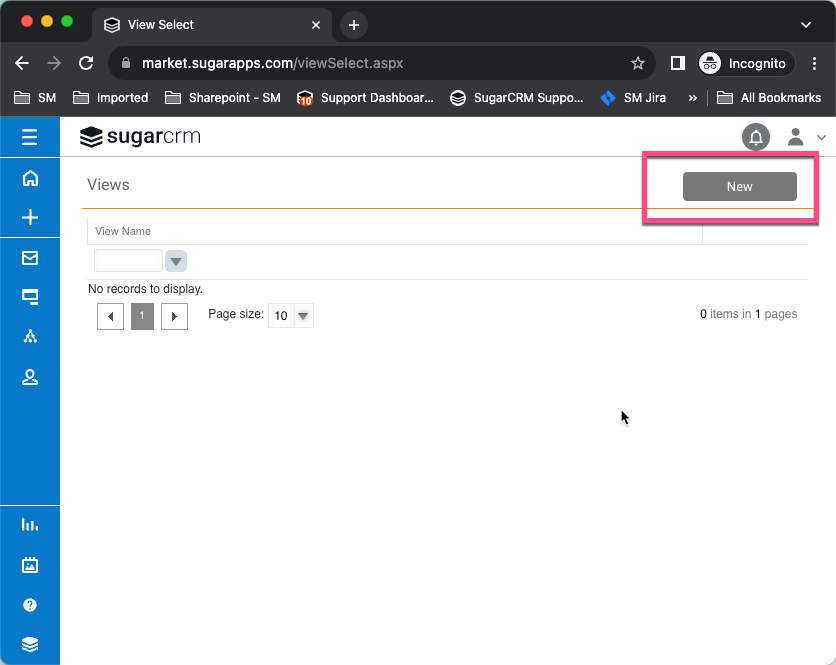
Click New.
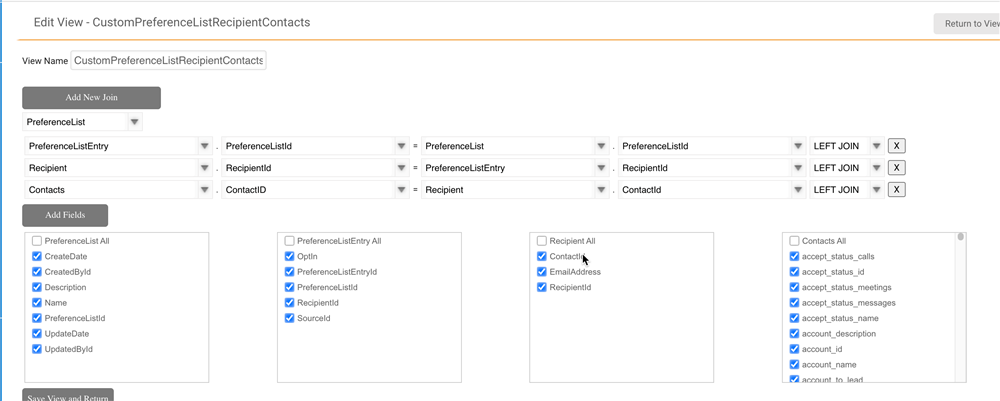
For this type of view, we want to join the following tables together:
- PreferenceList
- PreferenceListEntry
- Recipient
- Contacts
Here is an example of how this should be connected together:
We are ready to build our custom report!
Creating a custom report:
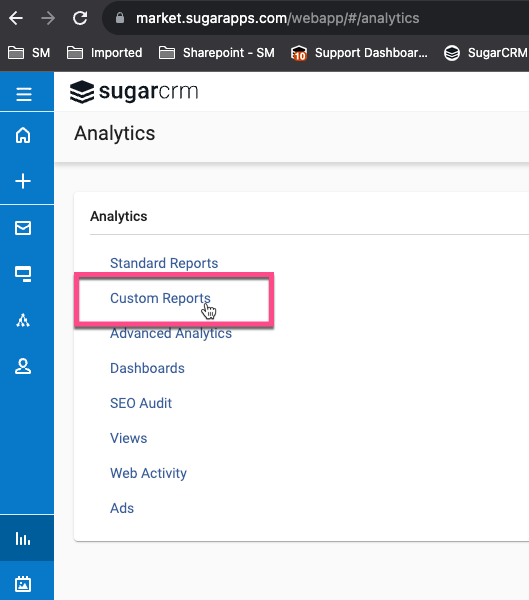
On the left navbar, click into Analytics again.
Select Custom Reports.
Click the Create button and select "Advanced Report"

Enter the following settings:
- Data Source: Custom Views
- Table/View: CustomPreferenceListRecipientContacts (if you named your custom view differently, then select that view instead)
- Report Type: Tabular
- Report Name: Preference List Member Details (This can be any name you want)
- Report Description: Enter anything you want here.
- Shared Report: Check this if you want to share this report with other users.
- Select Folder: Select the folder you want to store this report in.

Click Save.
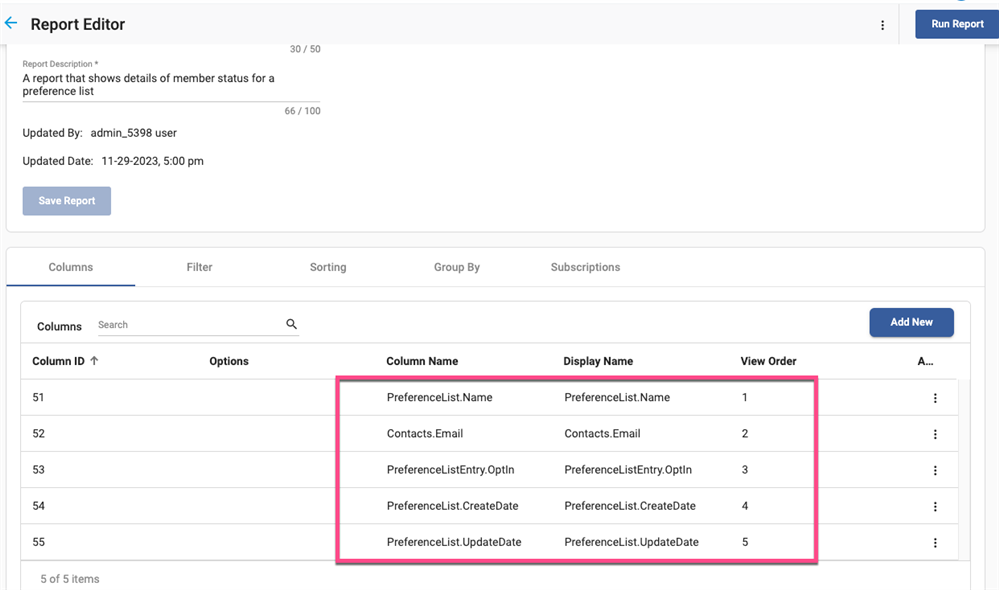
In the Columns tab, add the fields you want to see in the report by clicking the Add New button
The fields that I will add for this example are:
- PreferenceList.Name
- Contacts.Email
- PreferenceListEntry.Optin
- PreferenceList.CreateDate
- PreferenceList.UpdateDate
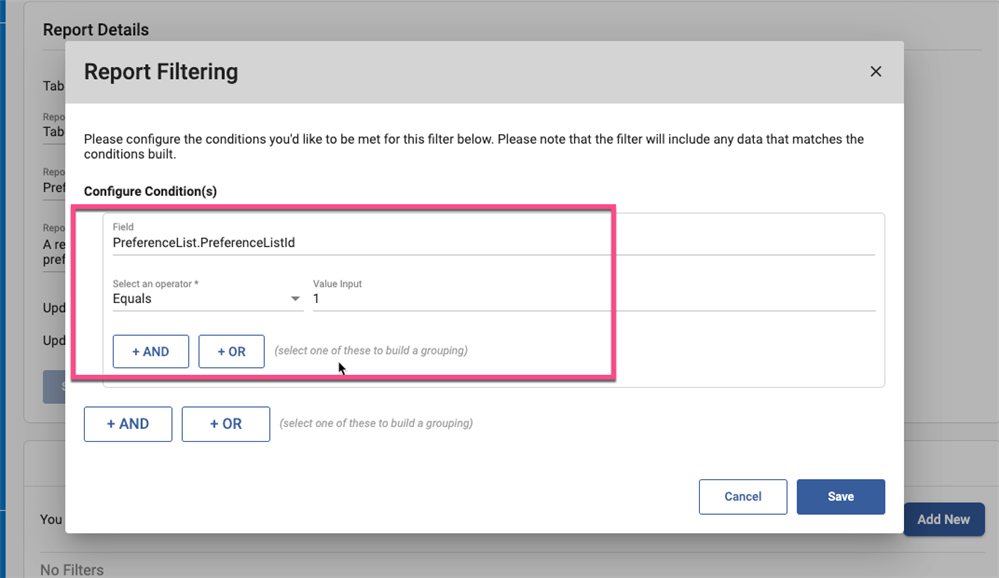
This report is currently not filtering on anything and that is fine if you want to report across all of your preference lists. If you are only interested in one specific preference list, then you can add a filter of:
PreferenceList.PreferrenceListID Equals {enter in the ID of the preference list}
When you preview the report, it should look similar to this:
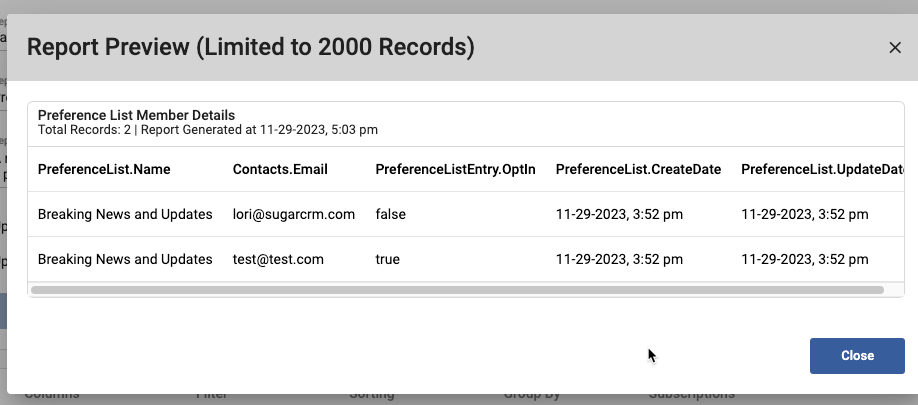
The PreferenceListEntry.Optin will say true or false, depending if they are opted in or not.
The CreateDate field will give you the date when that contact or lead was added to the preference list.
The UpdateDate will give you the last time this entry was updated in the list.
Conclusion
By creating a personalized view and harnessing the power of custom reports, you've gained insights that will elevate your communication strategy. You're not just equipped with data; you have a roadmap for action.
Take this knowledge and weave them into your strategy, tailoring your approach based on when contacts opt in or out. Whether it's adjusting content, refining timing, or enhancing personalization, the data from your custom report is your guide.
Your communication strategy is now a dynamic, evolving entity, and the information you've unlocked is the key to its ongoing enhancement.
