Sugar Summer '18 introduced confirmation links to allow customers to gather affirmative consent for using email addresses in campaigns. Check out Sugar Summer '18 (8.1.0) Overview for Sugar Developers for more details.
As discussed in Why SugarCRM developers should care about Data Privacy and GDPR, data privacy is an important topic that we are going to keep discussing here on the developer blog. Today is another installment specifically focused on best practices for getting consent to collect and process personal information.
General Data Protection Regulation (GDPR) has strict requirements for consent. However, consent to personal data processing is a big topic for regulation in many countries and especially applies to email marketing. Under GDPR, unless you have an existing lawful basis for using personal information, you need to collect explicit consent from the data subject when storing and processing their information in Sugar. By explicit consent, we mean it was freely given, informed, affirmative, and unambiguous. For example, a web to lead form with a pre-selected opt-in checkbox is not going to cut it in the EU, Australia, or Canada.
Let's look at a couple different ways of collecting explicit consent.
Collecting explicit consent
Collecting explicit consent is particularly important for marketing campaigns and business development. For other CRM use cases (like customer support), you may already have another lawful basis that gives you the right to process customer information.
Consent really just boils down to allowing someone to knowingly and freely give their permission for you to use their personal information. You could collect consent over the phone, written in an email, or over a handshake in person.
It is possible to collect explicit consent with a properly designed web form as well. There are lots of resources out on the web with advice for building compliant Single Opt-In (SOI) web forms.
However, a common practice for collecting consent is to use Double Opt-In (DOI) which is also known as Confirmed Opt-In (COI).
Double Opt-In (aka Confirmed Opt-In)
We all know web forms aren’t perfect. Sometimes users aren’t sure what they are signing up for themselves. Maybe they mistyped their email address and now somebody else is signed up for that mailing list. Or worse, somebody is a troll and intentionally signing them up for email or services that they don’t want. There is a better way and it is called double opt-in.
Double opt-in (or Confirmed Opt-In) essentially means that someone who puts their personal information into a web form must confirm twice. A user enters their information on a form and affirms that they want to subscribe to a service. They then get a confirmation email, text message, or some other communication where they can re-confirm their intention. This is typically done by providing a link in an email that users must then click to confirm.
Double opt-in is an easy way to ensure you have a clean mailing list or lead list full of people who went through the trouble to confirm twice.
Many of our customers use marketing tools such Act-On, Marketo, and others to manage their mailing lists and the necessary opt-in processes. As an added feature to Sugar’s Marketing capabilities, we are planning to include DOI/COI in a subsequent release. Meanwhile, here is how you can achieve DOI/COI with Sugar 8 or Spring ‘18.
Adding Double Opt-In to Sugar 8.0.0
If you have access to the Sugar 8 Preview then this is something you can try today. Otherwise you will need to wait until the official release in a couple short weeks.
This customization implements double opt-in behavior for specific email addresses stored within Sugar. The steps below involve Sugar Studio configuration changes as well as code level customizations. This example allows for any email address to be subject of a confirmed opt-in flow without any specific dependencies on Campaigns, web to lead forms, Leads, Contacts, etc. Note that since this customization is focused on the confirmation step of double opt-in so for this reason we prefer the term “Confirmed Opt-In”.
Once you have followed the steps below, you will be able to generate confirmation messages for new email addresses. For each email address that needs to be confirmed, there will be an associated URL that, when clicked, will confirm and opt-in the associated email address.
Step 1) Configure your lead forms or integrations to opt-out by default
You need to take some steps to make sure that email addresses are not prematurely opted-in within Sugar.
In Sugar administration, visit the “System Email Settings” panel and make sure “Opt-out new email addresses by default” is checked. You may need to enter SMTP Mail Server settings in order to save this change on this page. This is a new setting in Sugar 8.0.0.
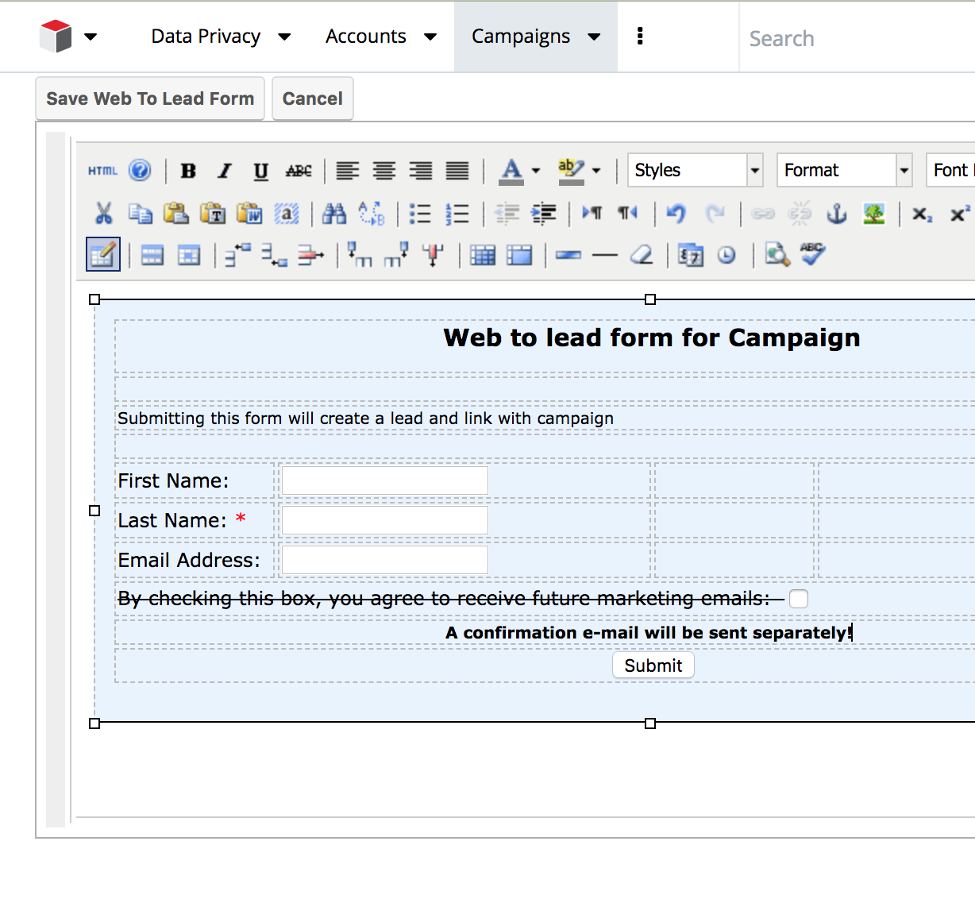
If you are using Sugar web-to-lead forms, they should be updated to remove the email opt-in checkbox that Sugar includes by default if it still exists. I’d recommend updating the form to let the user know that a confirmation email will be sent separately.
If you are using some other system (like a lead portal or marketing automation tool) to capture contact information, they should be configured to not send back email opt-out information to Sugar. Or alternatively they could be configured to set email opt-out to true by default.
Step 2) Add Studio configuration changes to Data Privacy module
In this example, we will reuse the Data Privacy module (new in Sugar 8.0.0) to track email confirmation activities. If you haven’t already, you may need to add the Data Privacy module to the list of displayed modules in the Administration panel first.
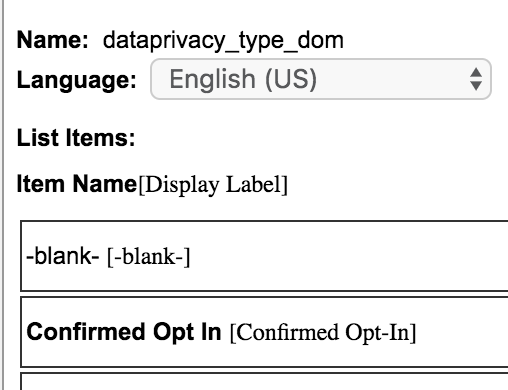
Add a new “Confirmed Opt In” option to the dataprivacy_type_dom used by the Data Privacy module’s type field. This will be used to differentiate email confirmations from other Data Privacy activities.
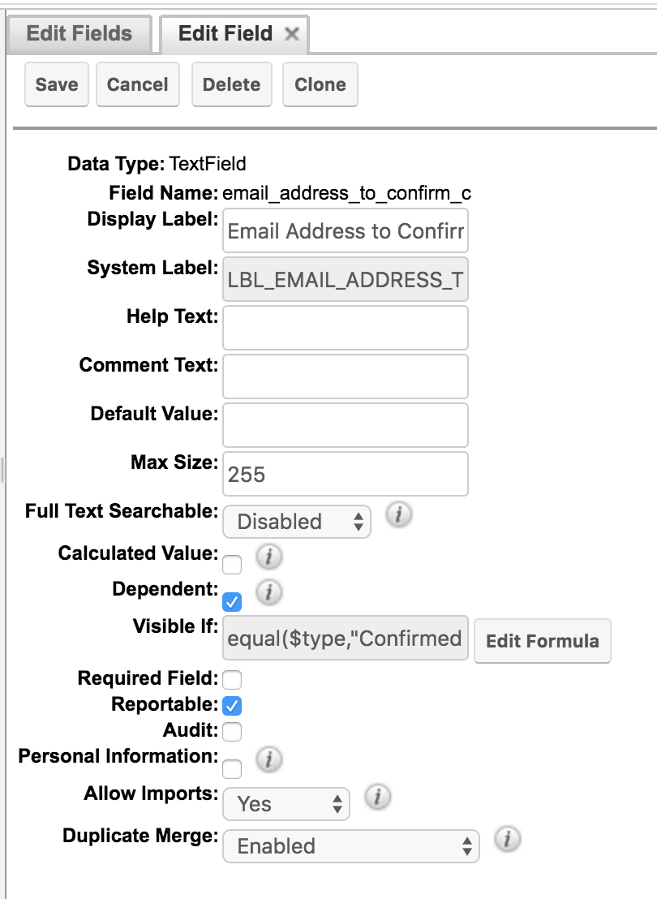
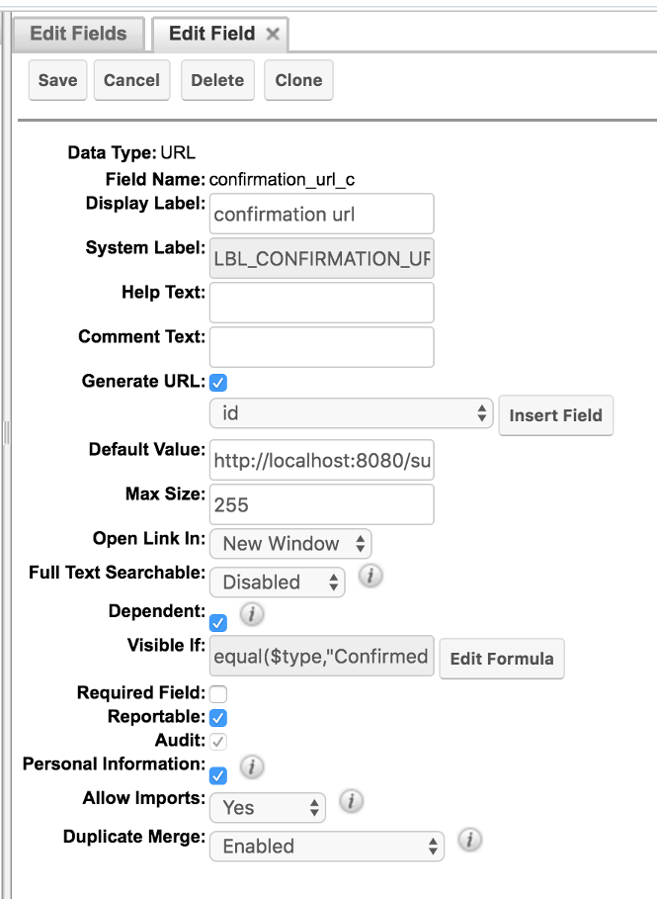
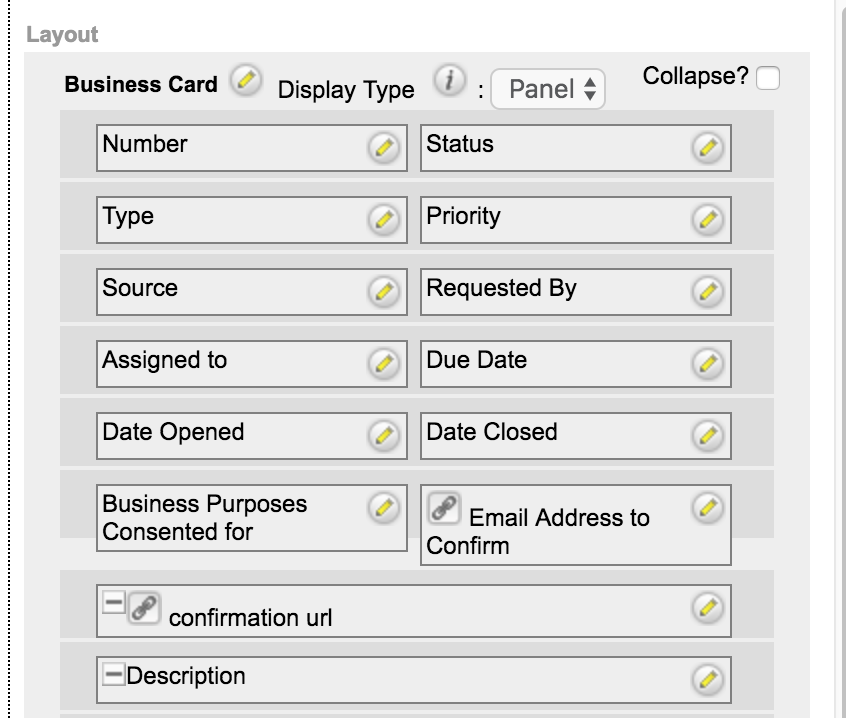
Also add two new custom fields that are visible only for Confirmed Opt-In activities. To do this, I used the following visibility formula on these custom fields.
equal($type, "Confirmed Opt In")The first is an email_address_to_confirm_c text field that stores the record ID for the email address that needs to be confirmed.
The second is a URL field called confirmation_url_c that will use a generated URL. The default value is designed to pass email_address_to_confirm_c field and the Data Privacy id field as parameters to a custom entry point that we will create later. The URL will vary based upon the site URL for your Sugar instance. For my development environment, I used:
http://localhost:8080/sugar/index.php?entryPoint=confirmEmail&email={email_address_to_confirm_c}&id={id}
Make sure to add these two new fields to your Data Privacy record layout as well which will help us with testing. Remember to Save and Deploy after adding them.
Step 3) Add the ConfirmedOptInManager class and related Entry Point
The following class includes two optional logic hooks as well as a required method that will be used by a new Entry Point. We are choosing to use a custom Entry Point here instead of a REST API endpoint because the Sugar REST API is designed to only return JSON responses. This makes for a poor usability experience for the person who is trying to confirm their email address and sees a page full of gobbledygook in their browser. Typically, people will expect to see a nicely formatted web page with a confirmation message. An entry point allows us to return an HTML response that matches user expectations.
The createConfirmedOptIn() method can be used as an after_save hook on the Leads module to automatically create a confirmed opt-in activity whenever new Lead records are created.
The sendConfirmOptInMessage() method is a stub that can be used as an after_save hook on the Data Privacy module to automatically send confirmation emails to end users. This could also be orchestrated using an Advanced Workflow.
The last confirm() method is the most important one. This method is called directly by a custom public entry point shown further below. This is what determines if the request is a valid one and then updates the email address record. It first loads the DataPrivacy bean, then compares the email address ID stored there with the one provided in the URL. It then updates the EmailAddress and DataPrivacy beans accordingly.
./custom/Extension/modules/Leads/Ext/LogicHooks/createConfirmOptInRecord.php
<?php
// Copyright 2018 SugarCRM Inc.  Licensed by SugarCRM under the Apache 2.0 license.
$hook_array['after_save'][] = array(
  1,
  'create_confirmation_record',
  null,
'Sugarcrm\\Sugarcrm\\custom\\ConfirmedOptIn\\ConfirmedOptInManager',
  'createConfirmOptInRecord',
);
./custom/Extension/modules/DataPrivacy/Ext/LogicHooks/sendConfirmOptInMessage.php
<?php
// Copyright 2018 SugarCRM Inc.  Licensed by SugarCRM under the Apache 2.0 license.
$hook_array['after_save'][] = array(
  1,
  'send_confirmation_message',
  null,
'Sugarcrm\\Sugarcrm\\custom\\ConfirmedOptIn\\ConfirmedOptInManager',
  'sendConfirmOptInMessage',
);
./custom/src/ConfirmedOptIn/ConfirmedOptInManager.php
<?php
// Copyright 2018 SugarCRM Inc.  Licensed by SugarCRM under the Apache 2.0 license.
namespace Sugarcrm\Sugarcrm\custom\ConfirmedOptIn;

/**
 *
 * Manages confirmed opt-in workflow for Email addresses
 *
 * Class ConfirmedOptInManager
 */
class ConfirmedOptInManager
{

    /**
     * After Save logic hook on Leads module (or any other Person module with an email address)
     *
     * Used to automatically create email confirmation records in DataPrivacy module.
     *
     * @param \SugarBean $bean SugarBean with an email address that needs to be confirmed.
     * @param string $event Logic hook event name. Expected to be 'after_save'.
     * @param array $arguments
     */
    public function createConfirmOptInRecord(\SugarBean $bean, string $event, array $arguments)
    {
        //If this is a newly created record
        if (!$arguments['isUpdate'] && $bean->load_relationship('emails')) {
            $address = $bean->emailAddress->getPrimaryAddress($bean);
            //And a primary email address is set
            if (!empty($address)) {
                //Create a new 'Confirmed Opt In' DataPrivacy activity
                $dpb = \BeanFactory::newBean('DataPrivacy');
                $dpb->name = "Confirm $address";
                //Note: This assigned user for Data Privacy activity MUST have the Data Privacy Manager role!
                $dpb->assigned_user_id = $bean->assigned_user_id;
                //We will store ID for primary address here.
                $dpb->email_address_to_confirm_c = (new \SugarEmailAddress())->getGuid($address);
                $dpb->type = 'Confirmed Opt In';
                $dpb->save();
            }
        }
    }


    /**
     *
     * After save logic hook on Data Privacy module
     *
     * Can be modified to send the confirmation message to the appropriate email address.
     * You should make sure not to send multiple messages for the same Data Privacy request.
     *
     * @param \DataPrivacy $bean DataPrivacy bean that has been saved
     * @param string $event Logic hook event name. Expected to be 'after_save'.
     * @param array $arguments
     */
    public function sendConfirmOptInMessage(\DataPrivacy $bean, string $event, array $arguments)
    {
        //Should only continue if this is a newly created Confirmed Opt In request
        if ($bean->type === 'Confirmed Opt In' && !$arguments['isUpdate']) {
            $log = \LoggerManager::getLogger();
            $eab = \BeanFactory::retrieveBean('EmailAddresses', $bean->email_address_to_confirm_c);
            if (!empty($bean->email_address_to_confirm_c) && !empty($eab->email_address)) {
                $log->info(
                    "Send out confirmation to $eab->email_address with link to $bean->confirmation_url_c."
                );
                // You could update to send message using mailer, SMS gateway, whatever.
            }
        }
    }

    /**
     *
     * Opt-in the email address if the email associated with given requestID matches the given emailAddressID
     *
     * Used with `confirmEmail` public custom entry point
     *
     * @param string $requestId
     * @param string $emailAddressId
     * @return bool
     */
    public function confirm(string $requestId, string $emailAddressId): bool
    {
        global $current_user, $timedate;
        // Since this is a public endpoint, we need to select a current user to associate with this action.
        // For our purposes, we will use the User assigned to the Data Privacy request since the person confirming
        // their email address is likely not a current Sugar user.
        // Note: For this to work, assigned/current user must be admin or have Data Privacy Manager role!
        if ($current_user && empty($current_user->id)) {
            $q = new \SugarQuery();
            $q->from(\BeanFactory::newBean('DataPrivacy'), array('team_security' => false));
            $q->where()->equals('id', $requestId);
            $q->select(array('assigned_user_id'));
            $results = $q->execute();
            //If no assigned user, then default Admin user will be used.
            $assignedUserId = empty($results) ? 1 : $results[0]['assigned_user_id'];
            $current_user = \BeanFactory::retrieveBean('Users', $assignedUserId);
        }

        $confirmRequest = \BeanFactory::retrieveBean('DataPrivacy', $requestId);
        //Make sure email address matches the one associated with the request ID
        if ($confirmRequest && $confirmRequest->email_address_to_confirm_c === $emailAddressId) {
            //If already closed, then no need to re-confirm.
            if ($confirmRequest->status === 'Closed') {
                return true;
            }
            $addrBean = \BeanFactory::retrieveBean('EmailAddresses', $emailAddressId);
            $addrBean->opt_out = false; //opt in!
            $addrBean->save();
            $confirmRequest->status = 'Closed';
            $currentTime = $timedate->getNow();
            $confirmRequest->resolution = 'Confirmation received on ' . $currentTime->format(DATE_RFC850);
            $confirmRequest->date_closed = $currentTime->asDbDate();
            $confirmRequest->save();
            return true;
        }
        return false;
    }

}
The last file is our public custom entry point, which we install with the help of the EntryPointRegistry extension. This will allow us to create a publicly accessible URL on our Sugar instance that can be used to easily display HTML for a user readable response.
./custom/Extension/application/Ext/EntryPointRegistry/confirmEmail.php
<?php
// Copyright 2018 SugarCRM Inc.  Licensed by SugarCRM under the Apache 2.0 license.
$entry_point_registry['confirmEmail'] = array(
'file' => 'custom/src/ConfirmedOptIn/ConfirmEmailEntrypoint.php',
'auth' => false
);
Since this is a public entry point, we should take extra care to validate user input. We will use the InputValidation framework to assert that the URL parameters are both the GUIDs that we expect for record IDs.
./custom/src/ConfirmedOptIn/ConfirmEmailEntrypoint.php
<?php
// Copyright 2018 SugarCRM Inc.  Licensed by SugarCRM under the Apache 2.0 license.
if(!defined('sugarEntry') || !sugarEntry) die('Not A Valid Entry Point');

use Sugarcrm\Sugarcrm\Security\InputValidation\InputValidation;
use Sugarcrm\Sugarcrm\custom\ConfirmedOptIn\ConfirmedOptInManager;

$manager = new ConfirmedOptInManager();
$validator = InputValidation::getService();

$recordId = $validator->getValidInputGet('id', 'Assert\Guid');
$emailId = $validator->getValidInputGet('email', 'Assert\Guid');

if ($manager->confirm($recordId, $emailId)) {
    echo "<h1>Confirmed!</h1>";
} else {
    echo "<h1>Unable to confirm.</h1>";
}
This page will just show “Confirmed!” if the email address was properly confirmed and “Unable to confirm.” if the confirmation failed which could be due to badly formed request or because the email address or data privacy record IDs didn’t already exist in the system. You could update this entrypoint to return whatever HTML you want or perhaps even to redirect the person’s browser to some other page.
For example,
header("Location: http://www.example.com/success");If you happen to see a blank page, then input validation has probably failed. You can check for a fatal message in sugarcrm.log for more details on the failure.
Step 4) Try it out!
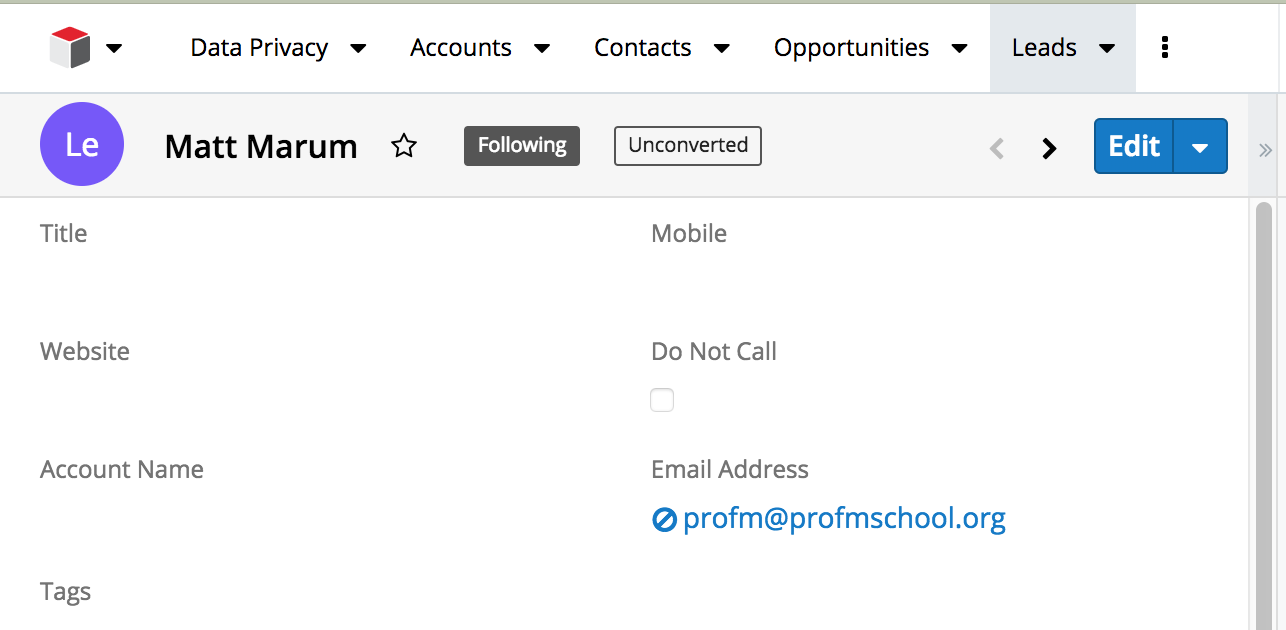
Create a new Lead record that includes a new email address.
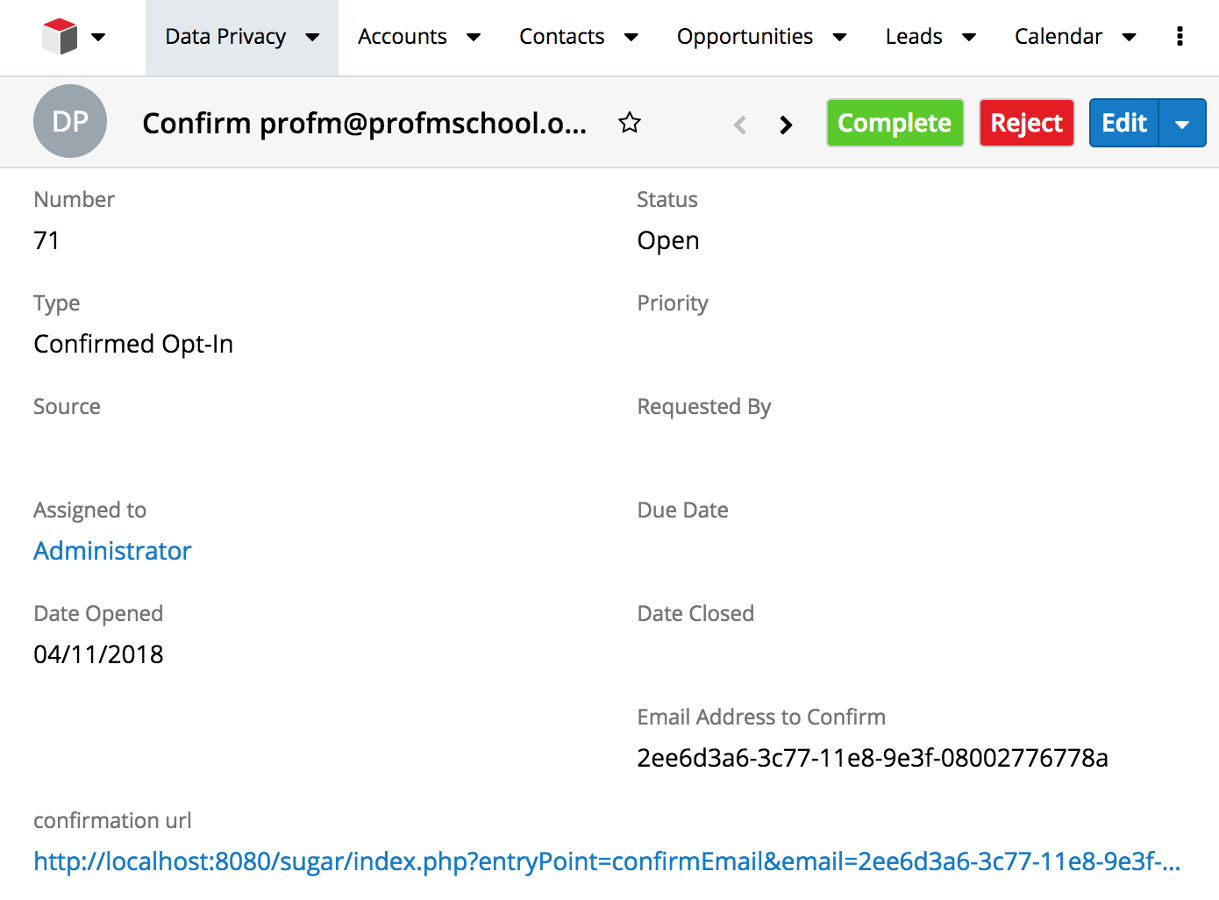
Switch over to Data Privacy module and you will find a new Data Privacy record like the one below.
For convenience, we can just click the confirmation URL itself to trigger the confirmation check of using an email to do it. In a real implementation, it may make sense to hide this URL from Sugar end users so they do not accidentally click on it since we expect someone who does not use Sugar to click it themselves.
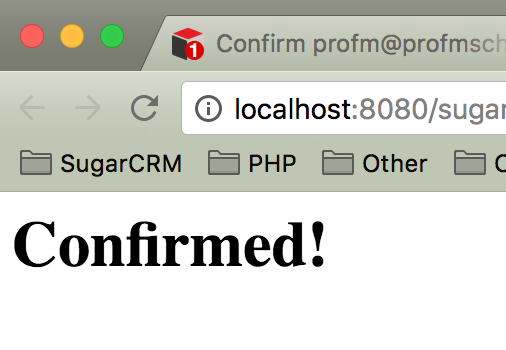
Nice, it was confirmed! If the request isn’t quite right or the email address is not in the system then you will get the “Unable to confirm” message instead.
If I return to my Data Privacy record, then I can see it has been completed and that the email address on my original Lead record has been opted in.
There is a lot that could or should be done to enhance this example for production use. But you can see that the pattern is straightforward to implement using existing Sugar platform extensions and APIs.



-

Martin Melmuk
-
Cancel
-
Vote Up
0
Vote Down
-
-
Sign in to reply
-
More Actions
-
Cancel
Comment-

Martin Melmuk
-
Cancel
-
Vote Up
0
Vote Down
-
-
Sign in to reply
-
More Actions
-
Cancel
Children